

It's close to Thanksgiving here in the U.S., and thoughts of many are directed towards carving (the turkey, that is).
But let's talk about a different kind of carving...
When I was getting my art degree, one of my favorite courses was Printmaking. In that class, students explored some of the most prominent kinds of printmaking: lithography, screenprinting, woodcut, and intaglio (etching).
Printmaking requires the artist to think in terms of positive and negative spaces. For example, if you’re doing a linoleum block print technique, which is much like wood block printing, the portions you carve out will be white while the uncarved portions will take the ink or paint and transfer those areas onto the paper (or fabric) surface.
Linoleum was invented by Frederick Walton (UK) in the mid-1800’s. At that time, linoleum’s main use was that of a floor material (are you old enough to remember linoleum flooring?). By the 1890’s, artists had started to use it as an artistic medium.
Artists in Germany, Austria and the United States seem to have been among the first to turn to linoleum for creating art around the turn of the 20th century. Linoleum was cheaper to produce, and offered an easier and softer surface to carve than wood and metal. It didn’t have the surface grains and textures that made wood trickier to carve.
When artists such as Henri Matisse and Pablo Picasso started using linoleum in the early 1900s, its popularity grew.
The materials required for today’s linoleum block printing are relatively inexpensive and easy to find. You’ll need linoleum blocks, carving tools, water-based inks, rubber brayers and block printing paper. A brayer is a small, hand-held roller used to apply ink, paint, or adhesive evenly onto a surface.
How I Create Patterns from Linoleum Block Prints
The steps are fairly simple. Give yourself time to plan your drawing and define where you'll leave white spaces and where you'll leave the areas to receive the paint.
1. Draw your design onto the linoleum block. I use a soft lead pencil. You can erase your pencil marks off the block. If it helps define the areas, color in the parts that will receive the ink.

2. When you're satisfied with the drawing, start to carve. NOTE: Be very careful because the carving blades are very sharp. Always know where your fingers are and carve away from them, not towards them.

3. Once the carving is done, I apply paint onto the block using the brayer. Don't let the ink dry. Have your paper ready on a flat surface.
4. You can either place the paper on top of the block or you can turn the block over and place it on the linoleum.
5. Apply even pressure to the areas of your carving but don't press into the grooves. You can use a clean brayer to adhere the paper to the block.
6. Gently peel the paper off the block. You should see a nice print of your drawing now. If you're not happy with it, wash off the block, reapply the paint and then press again.

NOTE: I don't worry too much if my block print isn't perfect because when I place it into my Illustrator document, I can clean up edges and missing parts.
7. Make sure the paper print is dry and then scan it into your computer. I scan at 300 dpi.
8. Place your scan into a new Illustrator document. Then, choose "Image Trace." I most often use a setting of 3 colors and put "Noise" at zero. I tweak the settings until I'm fairly satisfied with the output.
9. Select "Expand" and VOILA! All you have to do now in Illustrator is to clean up the design until you're happy with it. After that, you're ready to make your pattern.
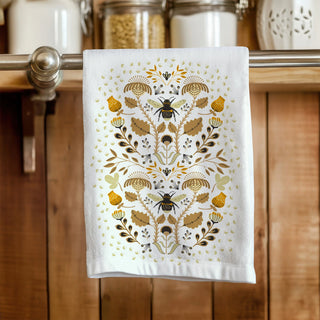
Here's one of my recent surface patterns from a linoleum block print. It's called, Block Print Garden and I placed it onto one of the cotton linen blend pillow covers that I offer in my shop.
